Beaded Sun-catchers, For Little Hands
Summer is the time of year that everyone heads out doors. Time is spend on decks and patios, in the outdoors and beauty of their own back yards. It might make you want to add a splash of fun and color, and a sun-catcher (like this Coastal one made from recycled materials) is a great way to do that.I was cruising Pinterest a while back, and came across what I thought was a quite beautiful sun-catcher. It was made out of choya wood and chunky glass beads most likely left over from other beading projects.
I thought it was a wonderful idea, and I pinned it to go back to later, and possibly do, as I have an abundance of leftover beads.
My mind took off as well. I'm the mom of a toddler, and I'm always trying to think of things we can do together. Working with tiny glass beads is nothing something that I thought he could do. Or working with itty bitty thread either. So I started scouting the craft store.
 They had some Paper Mache birdhouses on clearance, and I thought. I bet I could turn THAT into a sun-catcher!
Use some bright colored pony beads instead of fancy glass ones. Rex Lace instead of string, and as an added bonus he would get to PAINT the birdhouse!
Not to mention that even with the painting it was a simple craft that we could do in one afternoon!
Here is the completed Birdhouse Suncatcher.
Though
this is supposed to be a "SUN CATCHER" my little one didn't want me to
hang it outside, so it has ended up hanging on a nail above his bedroom
door.
Much like in this photo, its not actually catching any sun, but it makes a little boy very happy and that is all that matters.
Also, the white base is going to let the colors of the paint stand out more.
You CAN paint directly onto the paper mache, but it will take a few more coats of paint for your colors to show true, since a lot of the first coat will sink into the paper.
After that I put a shirt on my son that I didn't mind if it got paint on, and gave him some paints and let him go to town.

Flip the birdhouse over. Using an awl, an ice pick, a nail, or any other pokey tool, poke a hole in the center of the birdhouse bottom.
The type of tool you use doesn't matter too much, as long as the hole made is wide enough for your stringing material to go through, but not so wide that it will come back out once knotted.
After the center hole is poked, poke 4 holes toward the outer edge of the birdhouse as well.
You can add more or fewer extra holes if you would like. The more holes the more strings of shiny things will be hanging from your sun-catcher.
1. Thread a length of lacing UP from the bottom of the birdhouse to the inside, the OUT of the "door."
2. Tie a knot in the part of lace that is coming out of the door.
3. Pull the knot back INSIDE the birdhouse so that it catches. (make sure it wont pull OUT of the hole)
The string left hanging from the BOTTOM of the birdhouse is what your beads will be threaded on.
Not only does this help a young child work on hand eye coordination, but it also offers other learning opportunities.
You can talk about the colors of beads they are putting on the strings. If it is a variety box of beads you can talk about shapes. You can also work on counting and numbers.
You just want to remember, at the end of the string leave enough bead free room to tie a knot to secure your last bead in place.
Older kids might even enough tying knots throughout the stringing process, leaving some sections of string bead free.
Much like in this photo, its not actually catching any sun, but it makes a little boy very happy and that is all that matters.
Supplies
For
this craft, if you are a crafty mom, you will probably already have
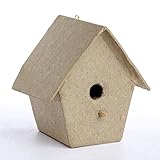
most of the items you need around your house, but you will need a paper
mache birdhouse. I got mine at a craft store. Wooden bird houses could
also work, if you have a drill to make holes in the bottom of it.

SUPPLY LIST

Paper Mache Birdhouse
Acrylic craft paint and brushes
Paper Plate or Pallet
Assorted Pony Beads (clear and sparkly ones work best)
Rex Lacing (or other stringing material suitable for little hands, yarn would also work)
Paper Mache Birdhouse
As
I mentioned elsewhere, you can do this project with a wood birdhouse,
but it takes a little more handy work. For wood you need a drill.
I recommend doing it with a paper mache birdhouse. It will be easier to poke the holes in it for the string to hold the pretty sun-catching beads.
I recommend doing it with a paper mache birdhouse. It will be easier to poke the holes in it for the string to hold the pretty sun-catching beads.
Choose
this option from amazon and you'll get not one, not two, but TWELVE paper
mache birdhouses to decorate. A craft day with the kids. A "rainy day"
project. A birthday party activity. This lots gotcha covered.
Painting the Birdhouse
Step 1
The birdhouses start out a Kraft brown color and are very "thirsty." I went ahead before we did the craft and painted them with a base coat of white acrylic paint. The paper mache could drink its fill of this coat and be "primed."Also, the white base is going to let the colors of the paint stand out more.
You CAN paint directly onto the paper mache, but it will take a few more coats of paint for your colors to show true, since a lot of the first coat will sink into the paper.
After that I put a shirt on my son that I didn't mind if it got paint on, and gave him some paints and let him go to town.

Poking the Holes
Step 2
A grown up should do this step!Flip the birdhouse over. Using an awl, an ice pick, a nail, or any other pokey tool, poke a hole in the center of the birdhouse bottom.
The type of tool you use doesn't matter too much, as long as the hole made is wide enough for your stringing material to go through, but not so wide that it will come back out once knotted.
After the center hole is poked, poke 4 holes toward the outer edge of the birdhouse as well.
You can add more or fewer extra holes if you would like. The more holes the more strings of shiny things will be hanging from your sun-catcher.
Adding the String
Step 3
This might be the hardest part of making the sun catcher.1. Thread a length of lacing UP from the bottom of the birdhouse to the inside, the OUT of the "door."
2. Tie a knot in the part of lace that is coming out of the door.
3. Pull the knot back INSIDE the birdhouse so that it catches. (make sure it wont pull OUT of the hole)
The string left hanging from the BOTTOM of the birdhouse is what your beads will be threaded on.
Stringing the Beads
Step 4
This is probably my favorite part of the project. Fishing through a box of beads, finding just the right ones to string on your birdhouse.Not only does this help a young child work on hand eye coordination, but it also offers other learning opportunities.
You can talk about the colors of beads they are putting on the strings. If it is a variety box of beads you can talk about shapes. You can also work on counting and numbers.
You just want to remember, at the end of the string leave enough bead free room to tie a knot to secure your last bead in place.
Older kids might even enough tying knots throughout the stringing process, leaving some sections of string bead free.
The beads are what make
this a sun-catcher instead of a wind-chime. When stringing your beads on
your cord make sure to get some clear and translucent ones in there.
Those are the ones that the sun will flash through.
I used an assorted tub of plastic beads, and rex lacing.


He
painted it all by himself, and picked out and threaded some of the
beads before he got bored and left Mommy alone to finish it.
I used an assorted tub of plastic beads, and rex lacing.
FYI
These are not meant to be hung outdoors in direct weather.
You CAN hang them on a covered porch area.
If
you hang them outside at all I recommend sealing them with an outdoor
sealer. I used what I had on hand (a product called Triple Thick) but I
recommend the Outdoor sealer by Mod Podge.
Outdoor Mod Podge can be used as an adhesive AND a sealant.

2 or 3 thick coats of Outdoor Mod Podge won't make your paper mache birdhouse waterproof, but will help make it water resistant.
It wont withstand a thorough soaking, but a little sprinkle won't hurt it anymore once it is well coated with this.
It wont withstand a thorough soaking, but a little sprinkle won't hurt it anymore once it is well coated with this.
The Artist and His Creation - Finished Birdhouse Sun Catcher
 |
| He was 3 years old when he made this, he has aged a little since then. |
Here he is, my lovely 3 year old son displaying the birdhouse he helped complete.
What do you think about our simple little project? Is it a rainy day craft you might do in the future?
(This post was originally posted to Squidoo, then moved to Hubpages when Squidoo sold out. It has been removed from Hubpages and re-posted here with some edits.)
I think your little craft is adorable. So is your little one with that curly hair.
ReplyDeleteCool! This is exactly the sort of thing my 6-year-old grand-daughter loves to do - with grandad's help of course. I might just do this or something very similar with her soon.
ReplyDeleteHow cute is that! What a clever idea and your son looks so proud of his creation.
ReplyDelete